Scan the WeChat code to contact us
Scan the WeChat code to contact us
Feel free to send us a email and we will reply to you as soon as possible.
Creating the future with heart and soul

A rail fastening system is the set of components that holds the rail down to the sleeper and keeps it in gauge. It looks like a collection of small steel and plastic parts, but it only works as a system: the clip clamps the rail foot, the pad cushions and insulates it, the shoulder or screw anchors the whole assembly, and the insulator isolates the rail electrically. Change one part without thinking about the others and the system stops behaving the way it was designed.
Understanding rail fastening system components matters more than memorising their names, because each part only makes sense in relation to the others. This is one layer of the wider picture I cover in the railway track components guide, but here the focus is narrower: how a single fastening works.
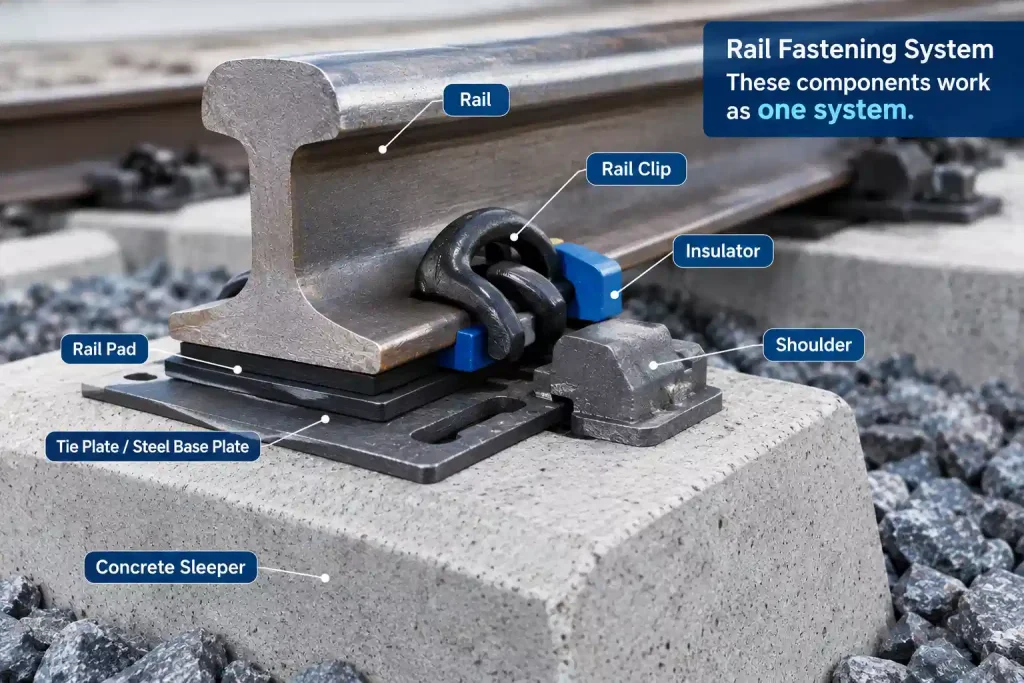
That is the point I want to make before anything else, because most of the confusion around rail fastening system components comes from treating them as separate items.
A rail clip does not hold the rail on its own. It presses the rail foot down against a pad, and that pad pushes back against the rail seat. The shoulder transfers the clip’s reaction force into the sleeper. The insulator keeps the rail electrically separate from everything around it. The screw or spike holds whatever needs holding to the sleeper. Each part does one job, and each job only makes sense in relation to the others.
Imagine you replace a worn rail pad with a stiffer one because it “should last longer.” The clip now sits at a different deflection, so its toe load changes. The rail sits slightly higher, so the gauge and the cant change. The screw preload that was set for the old pad thickness is no longer right. You changed one part and quietly changed four other things.
That is the thing nobody tells you about fastening systems. They are specified as matched assemblies, and they should be replaced as matched assemblies.
Here is how a wheel load actually travels through the rail fastening system components. The wheel sits on the rail. The rail foot presses down on the pad. The pad spreads that pressure over the rail seat of the sleeper. The clip, meanwhile, holds the rail foot down against the pad, and its reaction goes through the shoulder and into the concrete sleeper.
On concrete sleeper track the path is roughly: wheel to rail, rail to pad, pad to sleeper, while the clip and shoulder hold the assembly together against the sleeper. On timber sleeper track a baseplate or tie plate sits in the middle to spread the load over a softer bearing surface, and spikes or screw spikes fix the plate down.
Two separate things are happening at the same time. One is the vertical load being carried through the pad. The other is the clamping force that keeps the rail from moving, rolling, or lifting. People blur these together, and that is where mistakes start. The pad carries the load. The clip provides the clamp. They are doing different jobs through the same contact.
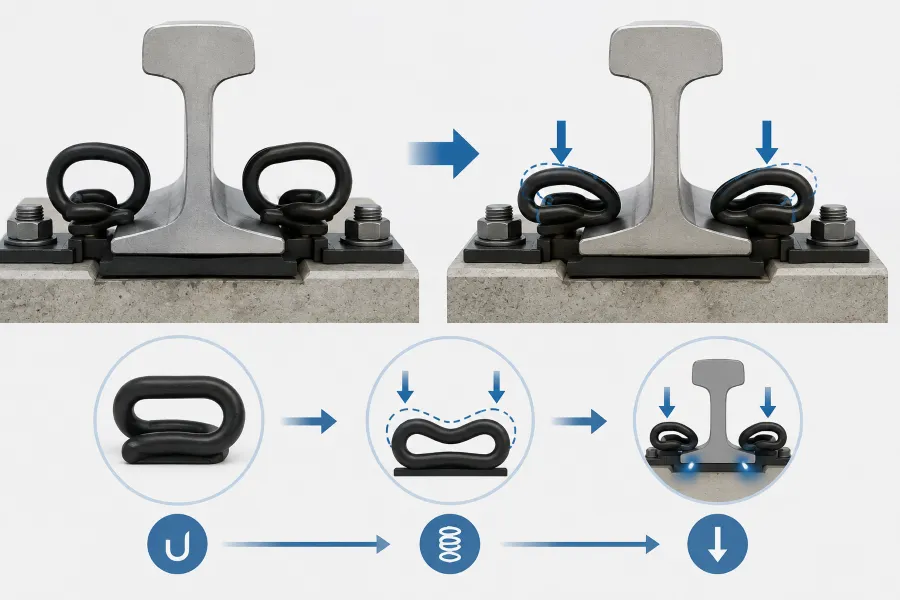
The elastic rail clip is the working heart of most modern systems, but “elastic” is the word that matters. If you want to go deeper on choosing one, I have written separately about elastic rail clip selection.
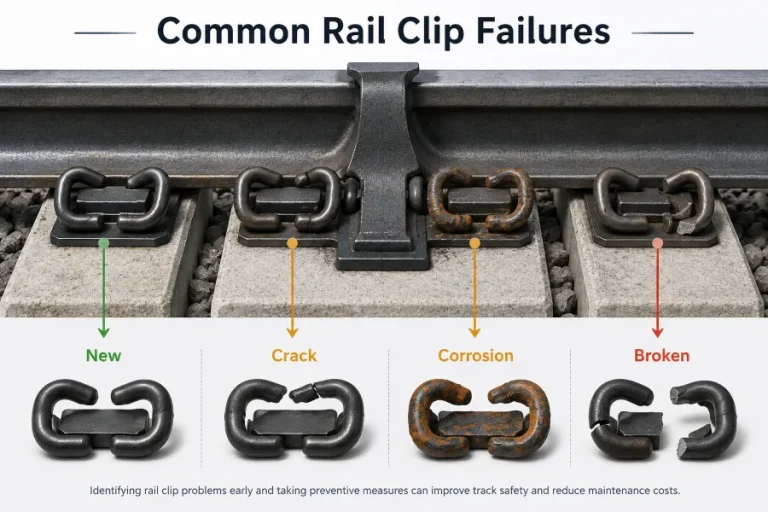
A clip is not a rigid clamp. It is a spring that is deflected when it is driven onto the rail foot, and it holds a defined downward force, called the toe load, against the rail for its whole life. That force is what stops the rail lifting, rolling, or creeping under traffic. If the clip loses its toe load through fatigue or poor material, it does not look broken. It just stops holding properly.
That is why the steel grade and the heat treatment matter more than the shape. A clip made from the right spring steel, hardened and tempered correctly, holds its toe load through millions of load cycles. A clip made from a cheaper steel can look identical on the drawing and lose its grip within months. I would be cautious about a clip where the supplier cannot tell you the steel grade and the heat treatment record, because the part that looks fine is often the part that has quietly stopped working.
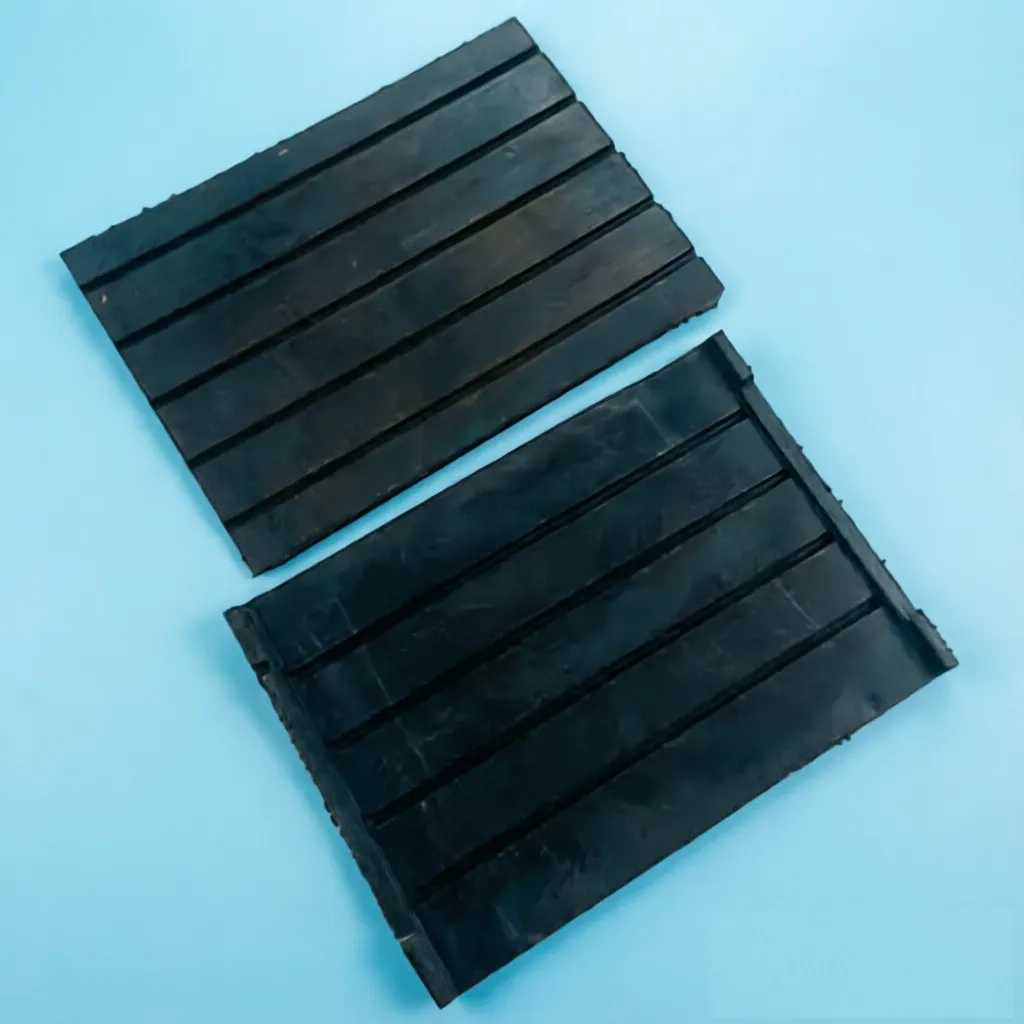
The rail pad sits between the rail foot and the rail seat, and it is easy to underestimate because it is hidden under the rail. The choice of material, rubber against EVA against polyurethane, changes how the whole system behaves.
Its first job is to spread the load. Without a resilient pad, the concentrated pressure of the rail foot would crack a concrete sleeper. Its second job is to absorb vibration and impact, which is why pad stiffness is chosen to match the track category. Its third job, on concrete sleeper track, is electrical insulation, because the pad is part of the barrier that keeps the rail isolated from earth for track circuit signalling.
The key point is that pad stiffness is a designed value, not an accident. A pad that is too stiff concentrates the load and can crack the sleeper under the rail seat. A pad that is too soft lets the rail settle, and when the rail settles the clip loses deflection and with it clamping force. The pad and the clip toe load are chosen together. A heavy-haul fastening uses a stiffer pad and a heavier clip. A passenger or metro fastening uses a softer combination to cut noise and vibration.
Something has to hold the clip and resist its reaction force, and that is where the shoulder or insert comes in.
On concrete sleeper systems, a cast-in or glued shoulder provides the seat that the clip locks into, and it pushes that force into the sleeper. On studded systems, a screw spike threads into a plastic dowel embedded in the sleeper and clamps the clip down. On timber track, screw spikes or cut spikes hold the baseplate to the sleeper.
These anchoring parts do not get much attention, but they are where a lot of failures show up first. A screw spike with poor withdrawal resistance, or a dowel that has cracked, means the clip cannot deliver its toe load no matter how good the clip itself is. The anchor is only as good as the material around it, which is why the dowel, the spike, and the sleeper all have to be considered together.
This one surprises people. On concrete sleeper track, the fastening system is part of the signalling system.
The rail must be electrically isolated all around. The pad isolates it from the sleeper below. The side insulators, sometimes called gauge blocks, isolate it from the shoulder and the clip laterally. These two components work as one barrier. If the pad or the insulator degrades and starts to conduct, the track circuit can leak to earth and give a false signal indication.
So a fastening component is not just mechanical. On a signalled line it is also an electrical component, and the insulation resistance of the pad and the insulator has to be checked alongside the clamping force during maintenance. A pad that still looks fine mechanically can be finished electrically, and nobody notices until the signalling starts behaving strangely. This is one of the reasons rail fastening system components should be assessed as a system, not bought as loose hardware.
I have mostly talked about the vertical load, but a fastening system is fighting on three axes at once.
Vertically, it carries the wheel load. Laterally, it holds the gauge and resists the outward forces of cornering and the flange forces in curves. Longitudinally, it resists rail creep, which is the slow sliding of the rail along the sleepers caused by thermal expansion, braking, and traction. On timber sleeper track, where spikes do not grip longitudinally as well as a studded concrete system, a separate rail anchor or anti-creeper is often added to stop the rail walking along the sleepers.
Gauge is the one that matters most for safety. A fastening system that cannot hold the rail laterally lets the gauge widen, and gauge widening of only a few millimetres is enough to create a derailment risk. That is why the lateral stiffness of the whole assembly, clip, shoulder, and insulator together, is tested and specified, not just the clip’s downward force. When I review a supplier’s documentation, I check that these rail fastening system components have been tested as a complete assembly under lateral load, because a clip tested alone tells you almost nothing about gauge holding.
This is where procurement goes wrong most often.
A clip type system, a tension clamp system, and a blade type system all do the same basic job, but they have different components, different clamping forces, and different maintenance methods. They are matched to a specific rail section, a specific sleeper, and a specific track category. A clip designed for a 60 kg rail will not seat properly on a lighter rail foot. A pad specified for one system will not give the right height or stiffness in another. The difference between an E-clip and an SKL clip is a good example of how two systems that look similar can be designed around different priorities.
The honest advice is to specify and buy the fastening as a system, from one design family, matched to the rail and sleeper. Buying the clip from one supplier, the pad from another, and the shoulder from a third to save money usually saves nothing in the end, because a fastening is only as good as its weakest member. That is the central lesson of rail fastening system components: they are designed as a set, and they fail as a set.
Rail fastening system components are cheap individually, which is exactly why they get treated as commodities. They are not. The questions that separate a real supplier from a reseller are about the system, not the part.
Ask for the fastening system drawing and the specification it is designed to, so you know the clip toe load, the pad stiffness class, and the geometry are matched to your rail and sleeper. Ask for the material certificates, so you can verify the clip spring steel, the pad material, and the insulator polymer against the specification. Ask for test evidence for the complete assembly, such as the performance testing required by a standard like EN 13481, rather than for each part in isolation. And ask for traceability, so that any batch can be followed back to its heat number and inspection record.
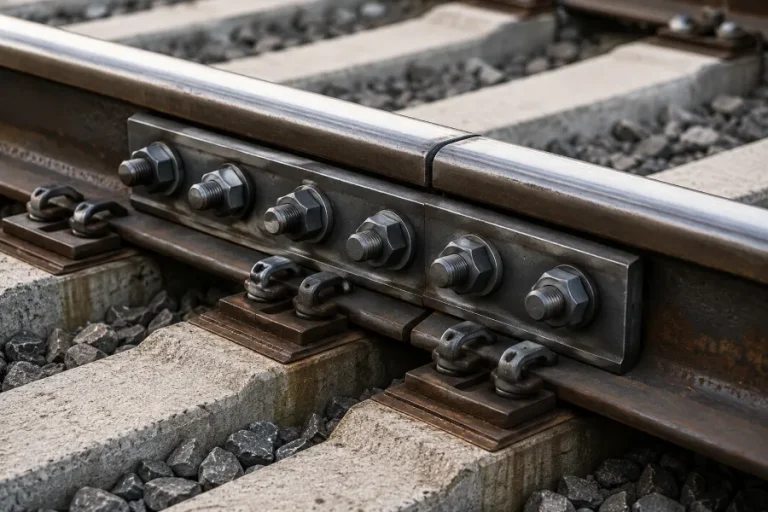
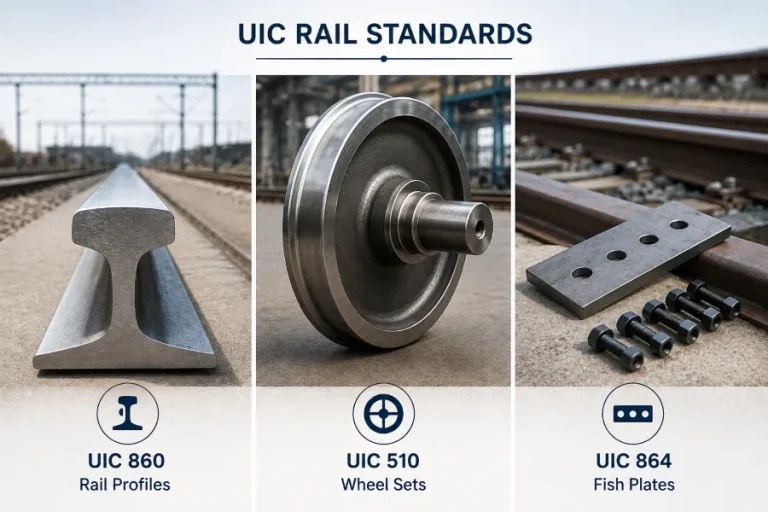
At a rail joint the same discipline applies to the rail fish plates and the fish bolts that hold them. The plate has to match the rail profile, and the bolt grade has to match the joint load, or the joint will work loose.
A supplier who quotes you a clip without asking which rail, which sleeper, and which axle load is not supplying a fastening system. They are supplying a part.
A fastening system is one of those rare things in railway engineering where the whole really is more than the sum of its parts, and also less than the strength of its strongest part.
The clip can be perfect. If the pad is wrong, the rail settles and the clamp is lost. The pad can be perfect. If the shoulder is cracked, the reaction force has nowhere to go. The shoulder can be perfect. If the insulator has gone conductive, the track circuit fails. Every part is a load path, and every part is a potential weak link.
That is why I keep coming back to the same advice. Understand the system before you change a part, and buy the parts as a system. Whether you are specifying a new fastening for a heavy-haul line or replacing worn components on an existing track, the worthwhile questions are about how rail fastening system components work together, not about any one part in isolation.
At FONYO, we manufacture rail fastening components including elastic rail clips, rail pads, and the associated fastening hardware, matched to the rail sections and standards your project requires. If you are reviewing a fastening specification or want a technical assessment of the right clip, pad, and anchoring combination for your track, send us your rail profile, sleeper type, and axle load. We will come back with an engineering view, not a sales pitch.
A typical system includes an elastic rail clip that clamps the rail foot, a rail pad that cushions and insulates it, a shoulder or insert that anchors the clip, a screw spike or bolt that fixes the assembly, and insulators that isolate the rail electrically. On timber track a baseplate and rail anchors are often added.
Toe load is the vertical clamping force a clip applies to the rail foot. E-type clips are commonly specified with a toe load in the region of 9 kN or more, and heavier clips provide more. The required value is set by the fastening system specification and must be maintained for the life of the track.
On concrete sleeper track the rail must be electrically isolated for track circuit signalling. The pad isolates it from the sleeper below, and the side insulators isolate it from the shoulder and clip. Together they stop the circuit leaking to earth and giving false indications.
Rail creep is the slow longitudinal movement of the rail along the sleepers, caused by thermal expansion, braking, and traction forces. Fastening systems resist it, and on timber track a dedicated rail anchor is often used to stop the rail walking along the sleepers.
Not reliably. Clip, pad, shoulder, and insulator are designed together, and the pad stiffness and clip toe load are matched. Mixing parts from different systems can change the clamping force, the rail height, and the gauge, which is why fastening systems are bought as matched assemblies.